From the intro to the review:
We've now got to the point in Symbian's lifecycle that the older variants, in this case S60 5th Edition, are so far from Symbian's cutting edge (and especially so in the light of recent cutbacks) are fair game for us to talk about modifications to the manufacturer-supplied firmwares. I'm still not going to write about 'hacking', as in trying to find ways to install 'cracked' commercial Symbian applications because that's plainly unethical and damaging to the app ecosystem. But complete firmwares that aim to add in features and tweaks that aren't present in the Nokia-supplied versions are right up my street and interesting to all.
Now, before I go any further, there are some things you should know:
- The firmware for a smartphone is very complex, many thousands of OS files and modules, all working in harmony. It's no wonder that bugs are common and when you start switching and swapping files between firmwares (e.g. the version being reviewed here has large chunks lifted from the Nokia N97 mini firmware) the chance of more bugs and generally unwanted interactions rises dramatically.
- Using the necessary tools (in this case 'JAF Emulator') and reflashing a firmware from complete ground zero isn't trivial. It took all my geek knowledge, a few pointers from friends, a couple of hours of time and a willingness to experiment and to possibly end up with a bricked device, but I got there in the end. Oh yes, and I had to run with anti-virus turned off on my Windows PC for an hour while the flashing tool did its job. If any of this paragraph makes you uneasy then forget the whole idea. Custom firmware remain a geek adventure, only set out on one if you're willing to suffer things going horribly wrong.
- You'll lose everything on your phone, of course. Although the flashing process doesn't actually touch the system disk or mass memory, the phone just won't work right until you've hard reset the phone. You have been warned. It will obviously help that this old S60 5th Edition phone probably isn't your main smartphone anymore. Do any backups needed before you start and don't come crying to us if you lose something important.
For the purposes of this walk through, I was using an old Nokia X6 (product code starting RM-559), following the (translated) instructions from the CFW Symbian Anna 7.9 firmware pages here. I was basically following the steps listed on the web page, but clarifying and amplifying things as needed.
Note that I had hard reset the X6 before I started. This isn't strictly necessary, but it's one less thing to go wrong later on. Just an idea.
1. The firmware files you download need to be in /Program File/Nokia/Phoenix/Products/RM-??? - where ??? is the product number of the phone you're trying to flash. And yes, you may need to make the 'Phoenix' folder manually first and yes, you'll need 'Administrator' privileges on your PC, of course. The folder should end up looking like this:
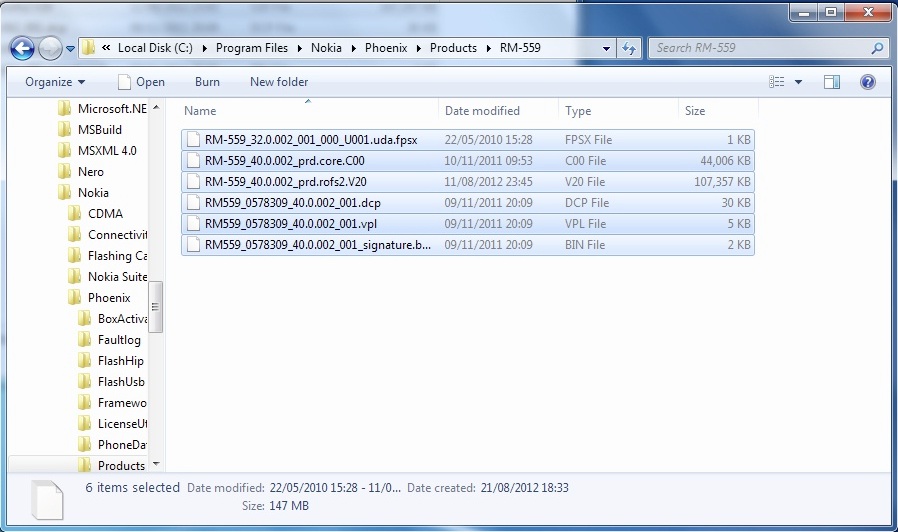
2. Disable your real time anti-virus software. Yes, I know this sounds crackers, but it'll complain at the 'JAF Emulator' (from the link provided in the article above) being malware. Don't worry, you're in no danger, but do remember to re-enable the a-v software after you're done flashing. Note that this DOESN'T mean to disable your built-in Windows firewall - but you're not that stupid, hopefully!
3. When installing 'JAF Emulator' (from the link provided in the article above), one of the first things that will happen is that you'll be prompted to install the 'Nokia Cable Driver' - resist the temptation to say 'yes', since your cable driver from Nokia Suite will be much more up to date. Say 'No' (i.e. not the default').
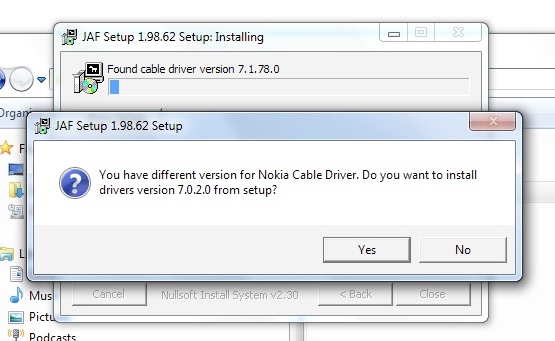
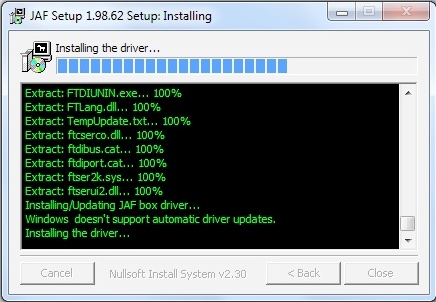
4. The JAF Emulator installation will then continue, you'll see other 'drivers' getting installed - which is OK, but....
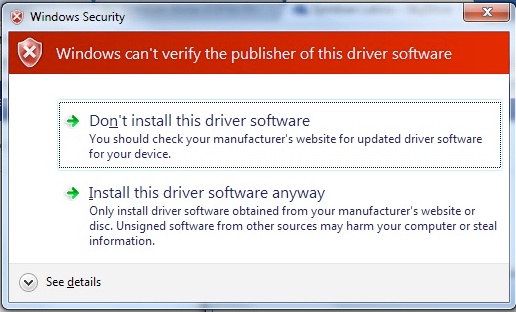
5. Depending on your version of Windows, you'll almost certainly get prompted with driver warnings such as this one - you DO need to accept these installs, i.e. click on 'Install this driver anyway' in each case. There are several to work through.
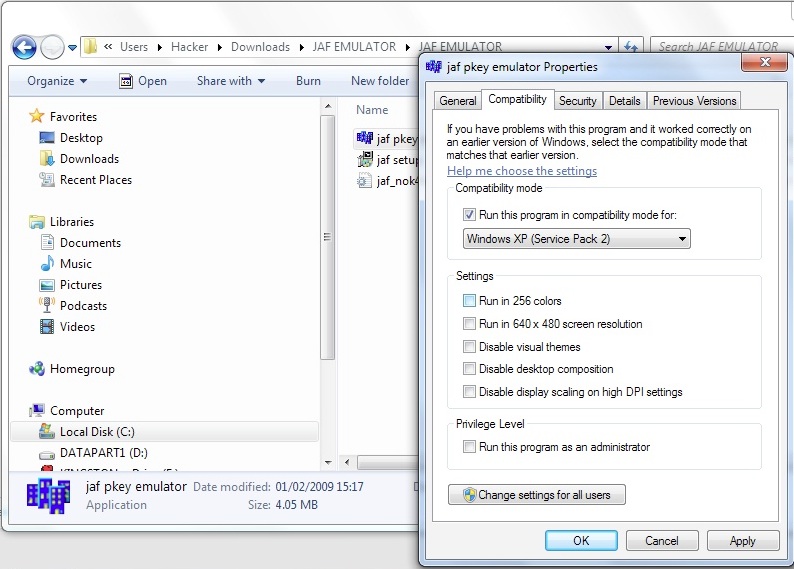
6. Once installed, don't run the software straight away - instead, in the original JAF Emulator archive, look for the 'PKEY Emulator' and right click it, to bring up its properties dialog. Under 'Compatibility', set it to 'XP SP2' mode. This seems to be because the software dates from a few years ago, before Windows 7 and XP SP3 were established.
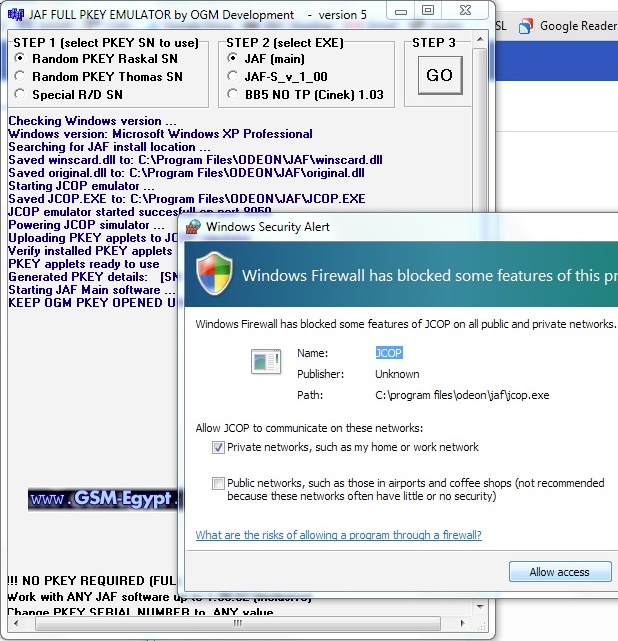
7. Now run the PKEY Emulator. Click on 'GO' and the PKEY will set itself up in RAM, effectively emulating the presence of a hardware dongle that the main JAF Emulator is going to look for. You will need to allow the PKEY Emulator through your machine's firewall into your Windows networking system, though you don't need to grant it access to the Internet, thankfully.
8. In C:/program files/odeon/jaf, you'll need a file " jaf_nok4models.ini "containing a reference to the product code you're flashing. Happily the developer of the firmware also usually includes a suitable text file with this name, just copy it into the right path and overwrite the (old) one that's already there.
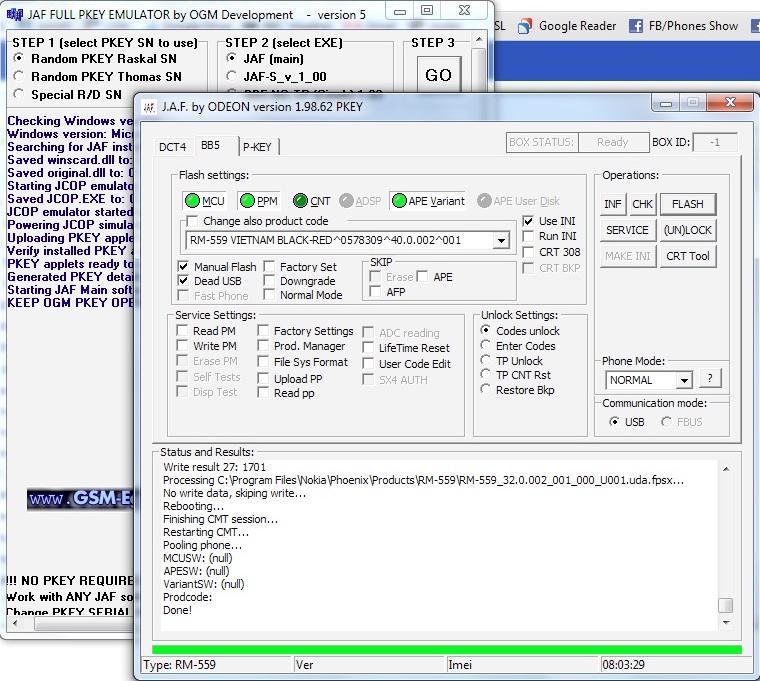
9. You can now run the JAF Emulator (the tool that actually flashes the phone's firmware). You need to set the check boxes to look like this, make sure to check the 'Use INI' box last of all:
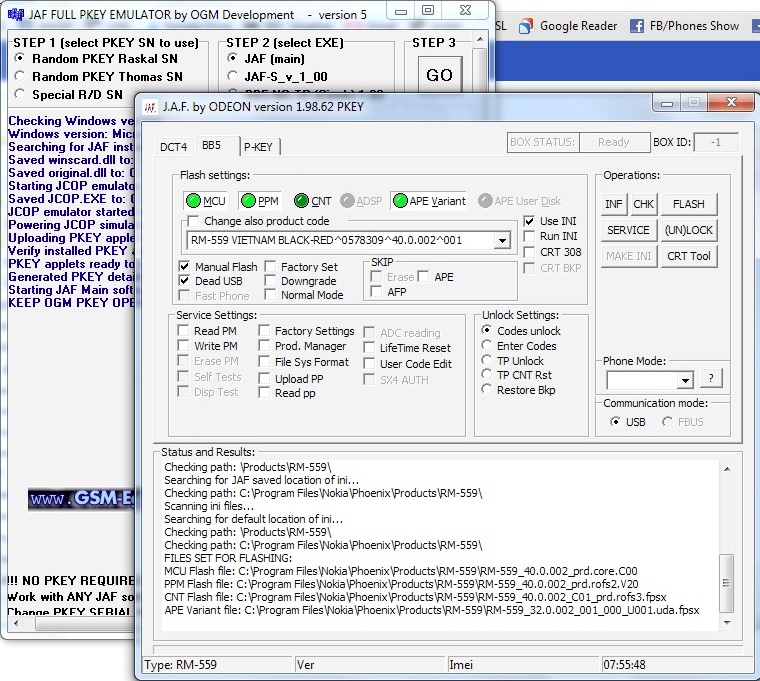
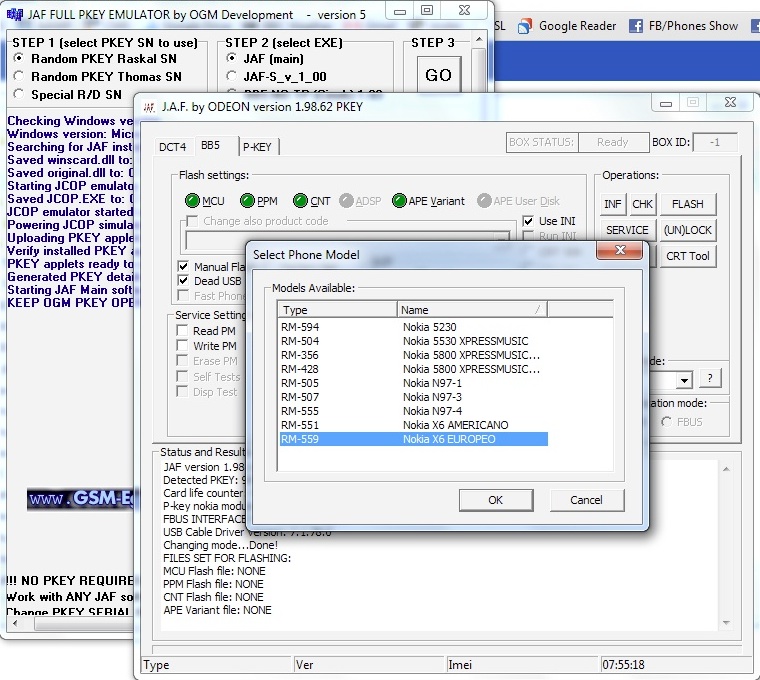
10. After checking 'Use INI', the INI file you copied in earlier will get read and the product code of the phone you're trying to flash will be in the mix. The codes in that INI file get presented on-screen, just pick the one you want and click 'OK':
11. Now click on 'Phone mode' and set if to 'Normal' - NB. it's important to be patient during some of these stages, as the software configures itself and (shortly) reaches out to the phone to communicate with it. If in doubt, count to 10 before concluding that 'it's broken'....
12. The moment of truth is upon us. With the phone turned OFF, repeat OFF, connect it up via microUSB and then click on 'Flash'. You'll see this warning, designed to stop someone installing firmware that's older than the version currently installed. I doubt that doing so would actually kill the phone, but anyway... In this case just click through.
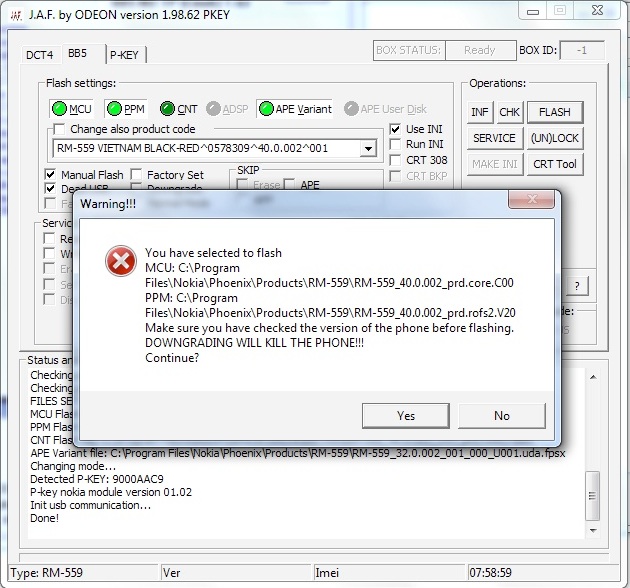
13. Press the power button on the phone. Something will start to happen as Windows recognises the 'dead' phone and starts to install a driver for it. In the meantime, JAF Emulator will complain that it couldn't find the phone. DON'T PANIC.
14. After a few seconds you should see this from Windows. If you don't see it, try pressing the phone's power button again.

15. Now click 'Flash' again and the flashing procedure should work without a hitch. Watch the messages fly and don't panic if they appear to stall. I had to wait for a good five minutes at the end before I saw 'Done'!
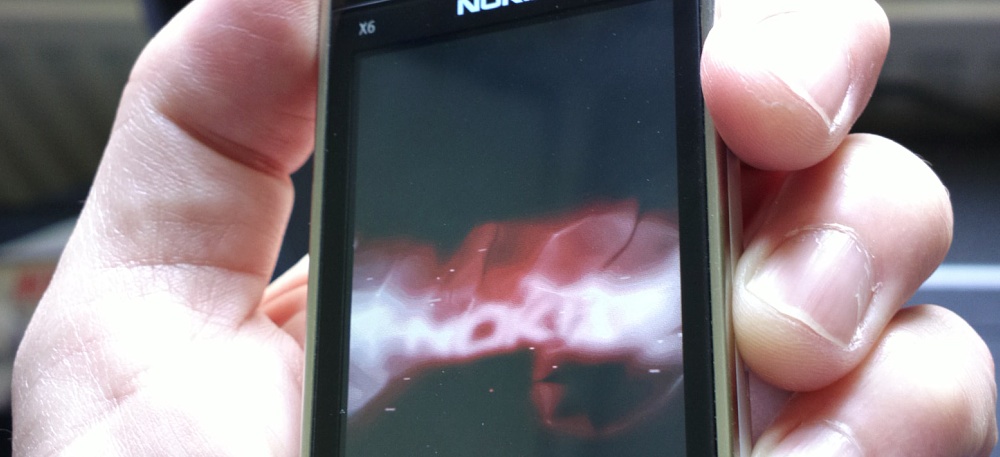
16. The phone will end up with 'Local mode' displayed on the screen. Just pull the battery and restart the phone as normal.
17. Restart your real time anti-virus software, if applicable.
18. Give the phone OS a few minutes to do any last internal installs and then do a hard reset (*#7370# etc). This reset is mandatory - if you don't do it, strange things will almost certainly happen - they did on my X6. Again, wait while the reset and restart happen and things sort themselves out.
19. Set date and time, Wi-fi, and so on, all the usual set up that you like.
20. Enjoy the new firmware (hopefully)!
__________________________
You see now what I meant about installing custom firmware not being trivial, I hope! Still, it's a geek fun way to spend a few hours on a rainy day and you may just end up with a revitalised old smartphone that would otherwise have sat in a drawer...
No hay comentarios:
Publicar un comentario