Firstly, a little required reading, i.e. my review of the Mugen 1500mAh BV-4D replacement, with my conclusion being that the actual capacity may have been a little lower than advertised after the first few charges but that it was almost impossible to test this properly with software. You could track the battery voltage and the discharge curve looked solid enough, but the only way to guess how much capacity was in the cell was to run it and run it and run it.... until it stopped.
Another consideration is the nominal voltage, here 3.8V for most of the discharge curve rather than the BL-4D's (as used on the N8 and E7) 3.7V. I didn't expect this to be an issue, since that's plenty to run the Nokia processor and electronics, but I was a little curious as to what would happen at either end of the charge curve, especially when charging up to 100% and when running down to ground zero (when the phone switches off). To this end, as part of this feature, I charge the Mugen cell until the E7 says it's full, then play videos until it finally dies.
The biggest obstacle to this sort of experimentation though is the closed design of the E7 itself. Whereas the N8 can famously be opened up in 30 seconds, the E7 is closed tighter than a bank on Christmas Day. Luckily, the most excellent LE55ONS channel on YouTube offered help and I followed the walkthrough in this video:
A few pointers, should you be thinking of doing the same as LE55ONS or, indeed, me:
- You'll void any remaining warranty - of course! Open this at your peril and don't come crying to us if something goes wrong.
- You'll need a Torx T4 screwdriver, plus a very small, high quality crosshead '#00' driver. Plus a strong fingernail!
- LE55ONS, in the above video, doesn't re-assemble the E7 in the exact reverse of the disassembly. So, if like me, you laid all the screws out in order, you'll be totally confused when it comes time to put it all back together! Better to spend a few extra seconds putting each batch of screws on a small piece of paper (or in a pot), labelled with where they came from!
The whole disassembly and reassembly procedure took around 30 minutes, working carefully. With practice, I'm sure I could get it down to 15 minutes, but it's still very obviously a 'don't do this too often' procedure.
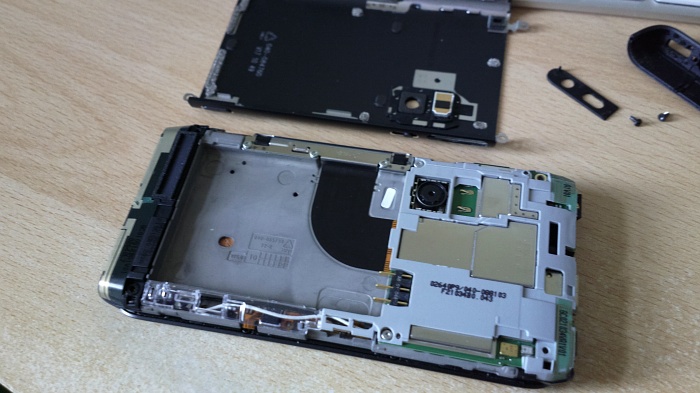
Here are a few snapshots from my transplant operation. First, the E7 disassembled as far as is needed to take the battery out:

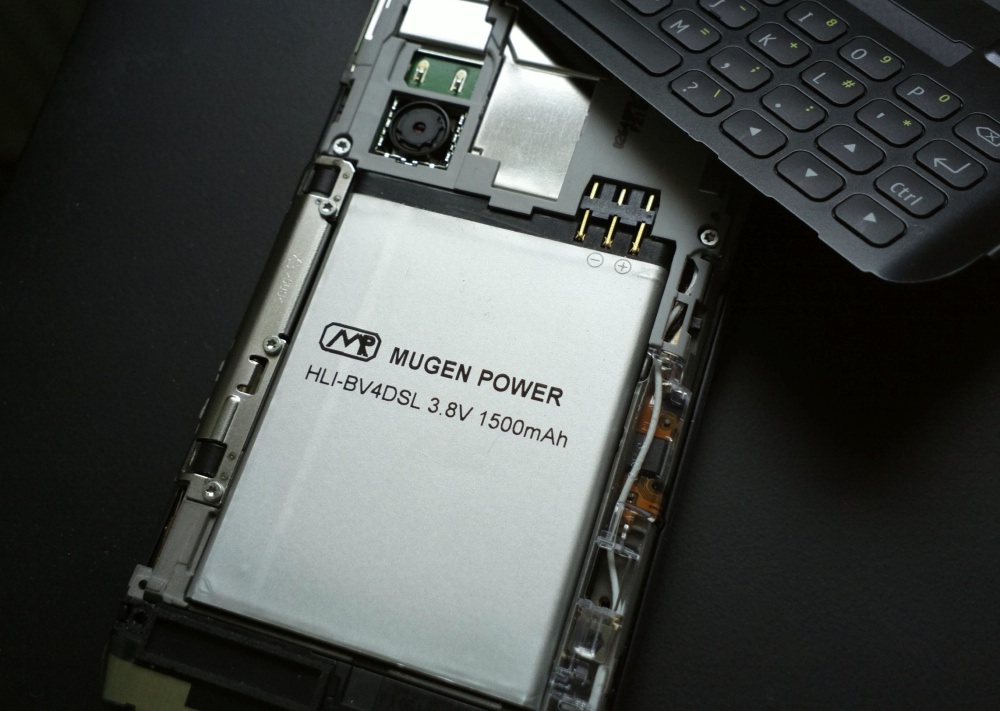
Then, the phone with the new Mugen 1500mAh cell in place - it was a tight fit as the battery seemed to have a small plastic protrusion on its end cap that the original didn't. The photo shows the underside of the Mugen battery because, as you can see, the pins are on 'top' and the battery this goes in upside down in this design:

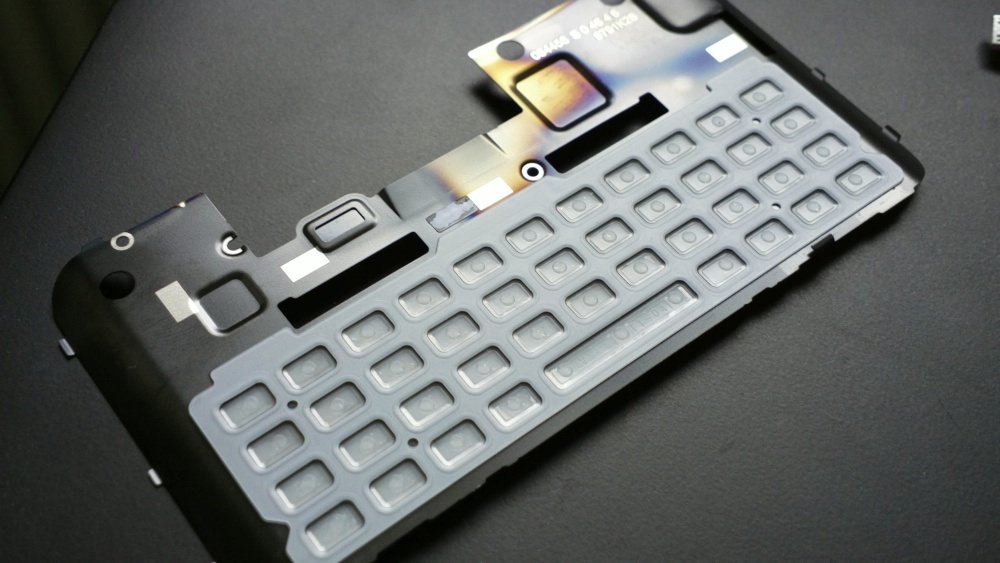
Of course, with the E7 in pieces, it was interesting to examine the various parts I'd removed under LE55ONS's expert instruction. Here, for example, is the underside of the E7 keyboard, showing the way the individual keys are 'sprung' on a membrane, with extra rubber nubs to ensure good contact with the microswitches on the top of the main circuit board:

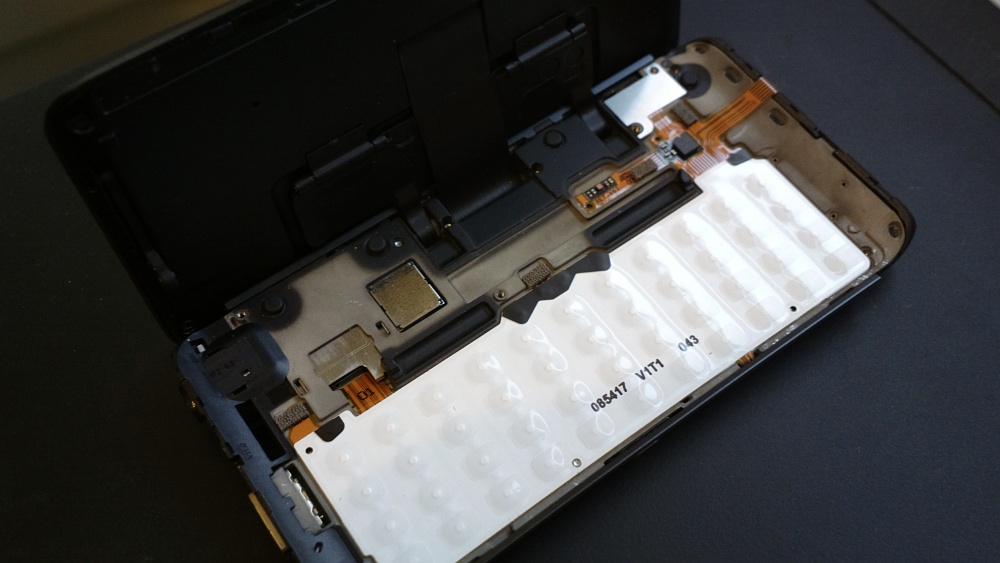
And here's the board with microswitches:

Time then to put it all back together. The parts that simply 'stick' back on went on smoothly enough, though an official Nokia Care point repair would use all new components here. If you were to do this DIY procedure more than a couple of times, the adhesive wouldn't stand up too well, I think.
Powering up the E7 and charging it fully, Phonetinfo was still only showing 1100mAh or so, but then it has been sulking ever since my first charge of the cell in the 808 - others on the 'net have reported 'nominal capacity' figures varying wildly between 900mAh and 1700mAh, so, again, I really only believe the battery voltage and am content to merely observe battery life under real world conditions.
I ran the E7, looping video playback, for five hours (disappointingly rather confirming that actual Mugen capacity here - for my somewhat abused cell(!) - was around the 1100/1200mAh mark), at which point the E7 shut off.
And it's at this point that things went off the rails. In my test of the Mugen 1500mAh cell in my 808, I noted that, after letting the device run completely out of power, I couldn't charge the cell in-situ in the phone. And the same happened here in the E7. Quite simply, nothing happened - I left it for two hours and - nothing. The charger wasn't getting warm, either, so it seems as if the Mugen cell, while behaving well at normal charge levels, really doesn't like getting very low, at least in an actual phone.
Which is something of a killer blow in a device like the E7, in that I couldn't just charge the cell in a standalone Nokia battery charger. In the end, I disassembled the E7 again and restored operation by putting my original Nokia battery in. All good practice with my precision screwdrivers!
The Mugen cell then charged fine in my charger, showing that the battery was very much alive - it just doesn't like charging from zero in a phone. A quirk which is a total showstopper in a closed device like the Nokia E7. You really don't want to dismantle it every time you let the battery run out!
A question for myself though: if charging from zero had worked in the E7, would I have left the Mugen cell in place? Probably - capacity wasn't worse than that of Nokia's original, though I'll also admit it wasn't better either.
I was right when I declared, from day one, to whoever would listen, that a 'sealed battery' design was a really bad idea for the E7. And I've ranted along these lines ever since, in more generic pieces.
So, sorry if I got your hopes for a 1500mAh E7 Communicator there for a moment. This particular DIY mod is definitely not recommended!
No hay comentarios:
Publicar un comentario